Archive for the ‘Recipes’ Category

Cauliflower pizza crust- super easy to make GF, Paleo and grain free

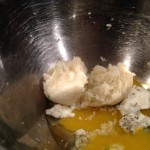
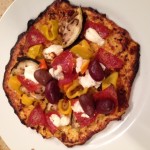
IMG_3213I recall the days of making cauliflower pizza crust for my son when he was on the ketogenic diet.  My family found it surprisingly delicious.  At that time the recipe we acquired was a bit more labor intensive.  Being the hunter that I am, I found a new-to-me recipe that cuts down the preparation to 10 minutes but  do allow 55 minutes for baking time (can’t seem to reduce the baking time yet).  Did I mention the total recipe only requires 3 main ingredients?


2 pounds cauliflower florets, riced
1 egg, beaten
1/3 cup soft goat cheese (chevre)
1 teaspoon dried oregano
pinch of salt

Directions:

Preheat your oven to 400F, then get to work on your crust.

Step 1: Begin by making your cauliflower “rice.”

Simply pulse batches of raw cauliflower florets in a food processor, until a rice-like texture is achieved.

Step 2: Cook & Strain the rice.

Fill a large pot with about an inch of water, and bring it to a boil. Add the “rice” and cover; let it cook for about 4-5 minutes. Drain into a fine-mesh strainer.

Now here comes the secret:

Once you’ve strained the rice, transfer it to a clean, thin dishtowel.

Wrap up the steamed rice in the dishtowel, twist it up, then SQUEEEEEEEZE all the excess moisture out! (Be careful not to burn your hands!)

It’s amazing how much liquid will be released, which will leave you with a nice and dry pizza crust.

IMG_3212

Step 3: Make & Shape the dough.

In a large bowl, mix up your strained rice, beaten egg, goat cheese, and spices.

Don’t be afraid to use your hands! You want it very well mixed.

It won’t be like any pizza dough you’ve ever worked with, but don’t worry– it’ll hold together!

Press the dough out onto a baking sheet lined with parchment paper. (It’s important that it’s lined with parchment paper, which is not to be confused with WAX paper– they’re very different!) ON a side note I used a silicone mat.  

Keep the dough about 1/3″ thick, and make the edges a little higher for a “crust” effect, if you like.

Step 4: Bake!

Bake for 35-40 minutes at 400F.

It’s that easy and absolutely delicious.

Be well,

Lynn

P.S.  I need to spread credit where credit is due: thanks to www.detoxinista.com for this updated recipe.

Healthy School Lunches

Awhile back I posted on the Facebook page “School lunch ideas” that were gluten and dairy free.  Still it’s helpful to get more ideas that can look and taste delicious and meet their nutritional needs with minimally 2 veggies, 1 fat and 1 protein.  

This parent really stepped it up in presentation and in options.  

40 Days of Gluten Free Lunches

Be well,

Lynn

9 out of 10 kids loved this shake

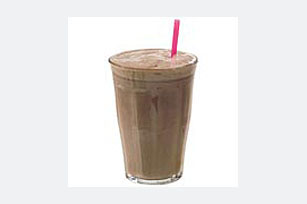
I recently hosted an after school enrichment class entitled “Yummy Healthy Shakes”.  My intentions were to teach kids in 3rd through 5th grades that food is consumed to not only taste good but to nourish the body.  I offered a digestive tract worksheet (I heard lots of “yuks”) and a breakdown of carbohydrates fats and proteins for them to consider when making their own shake.  We talked about sugar (I heard lots of disappointing sighs) and how it should be a special treat occasionally not occupy each of their meals.   The “Ughs” came when the half baby kale/salad joined the bananas, peanut butter, unsweetened cocoa and unsweetened almond milk in the blender.  BUT they all (yes even the 10th child who wouldn’t admit it) guzzled their shakes down.  A definite hit!

Here’s the recipe “Chocolate Banana Peanut Butter Shake”:

1 whole banana

1 tblspoon organic peanut butter (straight peanuts, no sugar added)

2 teaspoons unsweetened cocoa powder

1 cup of mixed greens

Enough unsweetened almond/coconut milk to cover 2/3rds of the ingredients in the blender.

Enjoy and be well,

Lynn

Easy, simple, chocolate pudding… to die for

The food manufacturers have convinced us that fast and easy pudding has to come out of a box.  This home made recipe is just as fast, pure in ingredients and a keeper (my kids gave it a huge thumbs up and they’re my biggest critics). 

Jello-Cook-and-Serve-Chocolate-Pudding3-500x421

   1 Lindt bar dark chocolate (3oz) (I use 85% dark chocolate)

   3 cups of your favorite milk (I use Unsweetened Almond Milk)

   1 tsp vanilla extract

   3Tbl Gluten free Cornstarch

                                          Stevia

Melt the chocolate bar and 21/2 cups of milk in a pot.  On the side, whisk the remaining 1/2 cup of milk and cornstarch in a cup and pour into the pot.  Add 6 drops of stevia.  When the chocolate mixture boils, turn it off.  Pour your pudding into individual cups or into the simple almond meal crust below for a pudding pie .  It’s delish. Enjoy.

Be well,
Lynn

Kale Chips- yummy, easy and kid friendly

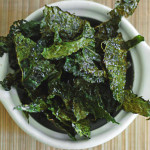
 Kale-Chips3The only time my kids ask for Kale is when I make Kale Chips. I love them because they’re packed with Vitamins A,C,K and B6, and magnesium, folate, iron and dietary fiber. And because they are super easy and fast to make.

Recipe:
Organic kale broken into pieces and rinsed
Tossed in olive oil
Place on a baking sheet in a single layer
Top with sea salt or himalayan pink salt
Bake at 350 degrees F for 10 minutes or until the edges of the kale appear brown or turning brown.
Cool for 5 minutes.

Do you bake Kale Chips? Do you offer a variation? I’d love to hear.
As always, be well,
Lynn

Trick and Treat your children this Halloween with Easy, Fast Gummy Bears

Easy, Fast Homemade Gummy Bears
Trick and treat your kids with homemade gummies
Write a review
Print
Ingredients
  1. ¼ cup lemon juice
  2. 2 tablespoon raspberry sauce
  3. 3 tablespoons grass-fed gelatin powder
  4. 1 tablespoon raw honey
Raspberry Sauce
  1. 1 cup raspberries, frozen or fresh (or any other berry or fruit juice)
Raspberry Sauce
  1. If you are using frozen raspberries, let them thaw out completely first, add to the food processor and pulse until smooth
  2. Pour into a strainer set over a bowl, and gently press the raspberries to extract their juices. This makes more than 2 tablespoons in case you want to double the recipe.
  3. in a saucepan, whisk together 2 tablespoons of the raspberry sauce with the lemon juice, gelatin and honey (add more honey if you like it sweeter)
  4. Heat the mixture slowly, stirring constantly until the gelatin is melted and all ingredients are well combined
  5. Pour mixture into silicon molds (about 3/4 full) and refrigerate until set. You can also line a basic pan with parchment paper and pour the mixture, then cut into squares after it is set.
  6. Homemade gummies can sit at room temperature or in the fridge.
Advocate for Healing https://advocateforhealing.com/

Out of this world ice cream made without dairy – and quick too!

This dessert was so yummy that my children didn’t believe what it was made from.  Here it is:

Peel and freeze one banana.

Mix in blender with a little soy milk, almond milk or coconut milk.   The texture comes out creamy and delicious just like real ice cream.  Top with wild blueberry sauce (frozen berries quickly heated in a saute pan). 

Perfect for one person.  Enjoy!

So I have all of these food sensitivities. Now what?

You’ve had it with inflammation!  You have followed the recommendations and took a food sensitivity test.  The results are in and you discover that nearly every food that you enjoy eating regularly is yellow or red-lined on the test results.  This means that the food that sits in your refrigerator, freezer and in the cupboard is now ‘out’.  You panic.  How are you going to manage cooking different meals.  Life is challenging enough.   Take a deep breath, there is promise, by following these few steps.

1.  KNOW that you are one step closer to ‘owning’ your health.  By even looking at the test results you’ll see that these are foods that are special to you because you are an individual.   Information is power. 

2.  FOLLOW the recommendations.  All moderate to extreme foods need to be omitted, for a minimum of 3 months. 

3.  THINK OF WHAT YOU CAN EAT, rather than what you can’t.  No chicken? How about Turkey.  No beef? Consider bison, buffalo, lamb, pork.  NO potatoes? Substitute sweet potatoes, yams or another root vegetable.  There are options.

4.  BUY nutritionally dense foods and organic when possible.  Fruits, vegetables, protein and grains. 

5.  KEEP IT SIMPLE.  It’s overwhelming to think that bread, soy, wheat, dairy, corn and eggs could be out.  Often vegetables, a protein and a grain of some sort can provide essential nutrition and meet the demands of all of the family members.

6.  BALANCE your meals.  Be sure that there is protein, vegetables (plural) and a grain with each meal.

7. TRY new foods.  Consider trying buffalo, quinoa or millet, or just one new food a week.

8.  UNDERSTAND that once healing occurs, many of these food sensitivities may be reduced. 

The most difficult part of accepting food sensitivities is changing habits. Trust me,  I know:

  • My daughter, Lainey has food sensitivities to: wheat, soy, dairy, eggs, bakers yeast, garbanzo beans and tomatoes.
  • My husband has food sensitivities to: dairy, eggs, bakers yeast and corn, sweet potatoes
  • My son has food sensitivities to wheat.
  • I have food sensitivities to dairy, rice, chicken and almonds. 

Here are a few sample meals:

  • Chicken, quinoa (with onions, kales, garlic and olive oil) zucchini and a fruit.
  • Make your own fish tacos: Corn and flour tortillas, cheese, black beans, lettuce, tomatoes, onions, guacamole,peppers and onions
  • Beef burgers (no buns), salad (olive oil/balsamic vinegar dressing), millet.
  • Baked yams, topped with organic lentil soup.

BELIEVE in your self and you’ll do great.

P.S. I’ll be adding recipes to the site on an ongoing basis. 

Be well,

Lynn