 My 10 year old son cares about his hair more than my teenage daughter does! It may stem from him having to wear a helmet for two years when he was sick. Regardless, he is a leader in pursuing a new hair style: the shave, the beatles, the rat’s tail and now the mohawk. He doesn’t consider what others are doing but rather pursues what he wants when he wants it. His rat’s tail was my least favorite, but I vow to keep quiet. This is his way of developing his individuality and I try hard to step aside. (Once, he insisted on getting his ears pierced so I bought him a magnet earring. Fortunately that “phase” passed. Phew!)
I’ve had in my house a toxic bottle of hairspray sitting in my cupboard for the past several years. I pull it out about once a year for a costume party that I’m attending. But yes, it’s toxic. Unbeknownst to me, my son used it for the first day of his new hairstyle, proud to display it at school. When I saw him after school I explained to him that it was extremely toxic and a product that should either never be used or used only once in a while. In other words this product is not something to use consistently nor regularly. I showed him the bottle and we discussed the ingredients. Some of you may be thinking… ‘wow, Lynn just said it was okay for her son to use a toxic substance?’. Yes, you are correct. But allow me to explain a bit more. He’s at the age of 10 and exploring his independence. Anything “taboo” is enticing to him. He’s my child that will say “yes, mom” and do what he intended to do. He WILL be exposed to other toxins in life and he does spend time outside of my mostly “protected” home. I took this as a good opportunity to inform him.
He chose to use the hairspray on day 2 as well. I trashed the hairspray.
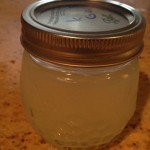
 I reached out to Google and found this excellent simple, fast, recipe that was entirely natural. And even better, it worked! Now we have a win-win situation. He’s using consistently a natural, non-toxic hair gel that I’ve made and lives in our house. The toxic opponent has been permanently removed. I’ve learned that he’s not ready to make the best health decision unless the natural product is his only option. But I’m hoping that when he’s exposed to other toxic substances in the future he’ll be thinking about what we discussed.
Here’s the recipe. Adapted from DIY Natural
Homemade Herbal Styling Gel
This homemade styling gel contains no harsh, drying chemicals or synthetic materials.
Ingredients:
- ¼ teaspoon unflavored gelatin (where to buy unflavored gelatin)
- ½ cup hot distilled or filtered water (where to buy the best water filtration systems)
- 4-6 drops essential oils (where to buy 100% pure essential oils)
Heat water and mix together with gelatin in a small bowl. Stir well to combine and refrigerate for about 3 hours, or until set. Once cooled and set, add essential oils if desired, and stir to combine. Using a funnel, transfer to a small squeeze bottle for easiest dispensing. Keep styling gel refrigerated between uses. Gel will keep for about 2 weeks in the refrigerator.
Use this homemade product on wet or dry hair and style as usual. I have had great results with both.
Be well,
Lynn

 November 9th, 2015
  Lynn
Lynn  Posted in
  Tags:
Tags: 
